In this post, I’ll show how to unit test Google’s Room persistence library with LiveData in Android project written in Kotlin. You can find the project’s code on my GitHub.
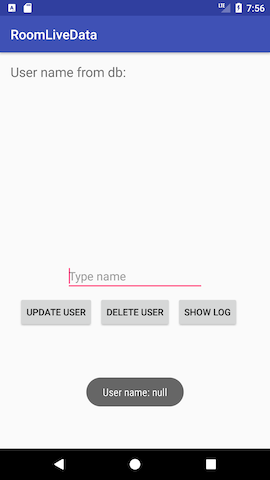
The app is just storing user’s name in our Room database. The View is observing LiveData retrieved from the database by the ViewModel.
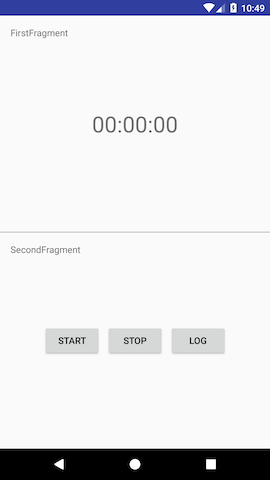
The database is empty and when we tap “SHOW LOG” it is displaying “null”:
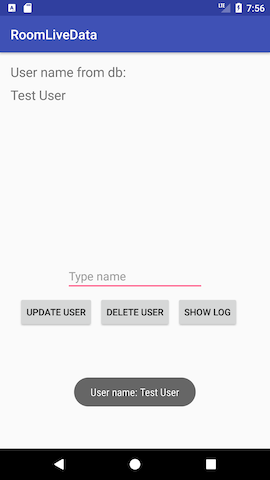
After adding the user, the UI is refreshed and the “SHOW LOG” is displaying our new user:
Lets take a closer look how this functionality is implemented. First we have our User object:
It is a Java class. The reason for that is Android Studio is not yet (at the time of writing this blogpost) code highlighting and completion for Room SQL queries in Kotlin. There are 3 standard SQL methods (insert, delete and update) but also two more interesting: getUser() and getUserAsLiveData(). The latter is returning User object wrapped inside a LiveData. I’ll explain that later in this post.
Then we have our database:
It contains one entity (User) and one Dao (UserDao). The companion object is just a quick way to have an instance of our database as a singleton. In production, you probably should use some dependency injections framework (such as Dagger 2) to provide your database instances. The rest of the code is pretty straightforward.
Now, let’s switch to the unit testing part. First, we need to create our database for testing purposes. Let’s use an abstract class here for code reusability:
For testing purposes, we’re using Room’s inMemoryDatabaseBuilder. It will create a non-persistent instance of our database, which will be discarded after the test ends.
Then we create our UserDaoTest class by extending abstract DbTest class. Don’t forget to use the open modifier and annotate the class with @RunWith(AndroidJUnit4::class).
Testing inserting and deleting user is pretty straightforward:
Room’s “in memory” database allows main thread operations so we can just call appDatabase.userDao().user to retrieve the User object. The problem arises when we want to call getUserAsLiveData() method. This method returns LiveData object. Room calculates the value wrapped in LiveData lazily, only when there is an observer. Fortunately using Kotlin’s extension functions we can solve this problem in elegant way.
Let’s provide a LiveData extension that will observe the value stored in LiveData, blocks the thread and returns the value:
Now we can use that in our test case:
First we call val userWrappedInLiveData = appDatabase.userDao().userAsLiveData which returns LiveData object. Then we apply our extension function to get User object: val userFromDb = userWrappedInLiveData.getValueBlocking(). As we can see, all three tests are passing:
During 2017s Google Developer Days Europe Florina Muntenescu gave this great talk explaining Android Architecture Components. It is only 15 minutes long (last 5 minutes are about new
android.support.v7.recyclerview.extensions) and addresses all the issues I encountered using it in a very clear way. Highly recommended watch.
In May of 2017 Google announced its TensorFlow library’s version dedicated for mobile devices, back then called TensorFlow Lite. Later they rebranded it as TensorFlow Mobile. Google used a process called Quantization, which is basically a way to represent neural network’s structure using lower than 32bit floating point computer formats. In the case of TensorFlow Mobile, the 8bit fixed point format is being used.
The whole point of this library is to use it on low-power devices with limited storage since “traditional” deep neural nets can be both huge in size (hundreds of megabytes) and very demanding in computationally (which requires powerful hardware and a lot of energy).
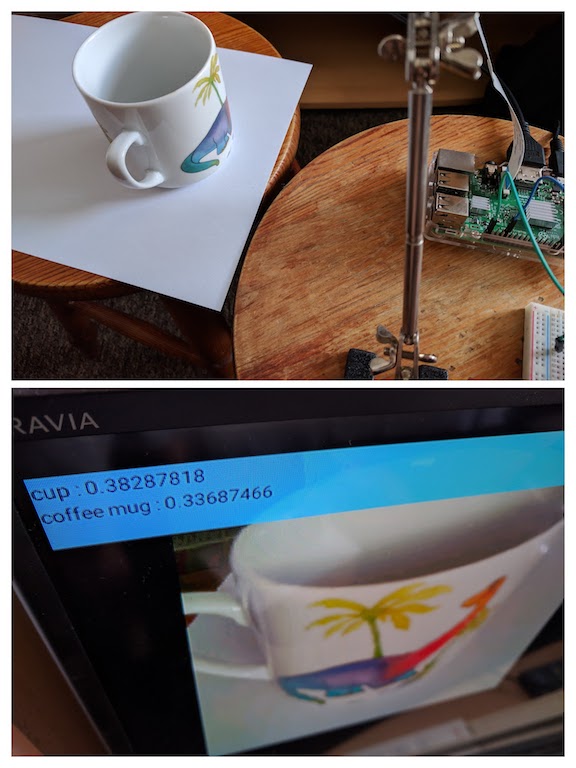
Here is the setup I used. The camera is an old 5-megapixel module from 2013. The picture quality isn’t too great by today’s standards. I used slightly modified soldering gripper as a makeshift tripod.
Quick and dirty setup
It recognizes the conch shell with 51% certainty
Schematics of the project:
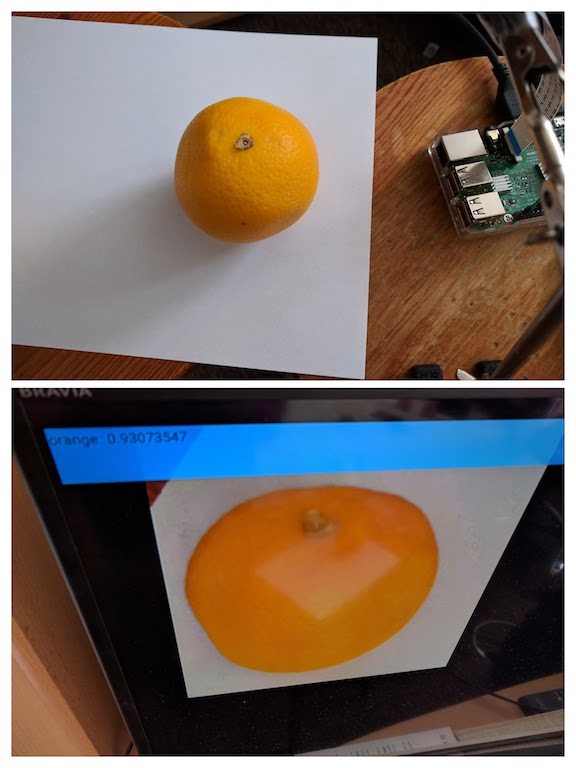
Here are some other examples of the network at work:
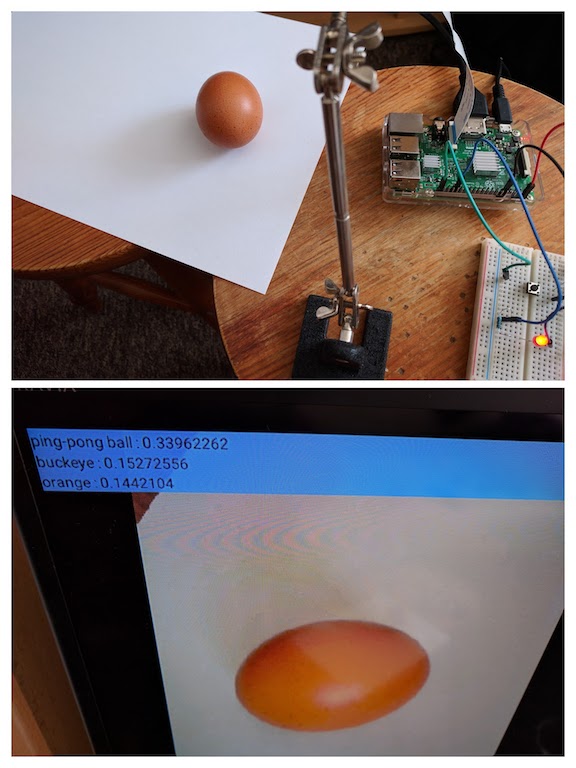
Of course, the network isn’t perfect:
The whole app’s size is ~70MB. Keep in mind all the app’s work is done offline, contained in a tiny RP3 body. It takes under one second to do the inference on the picture. I think future looks particularly promising with the advances in hardware (new cheaper and more powerful IoT platforms) and machine learning algorithms.
Google recently released its official guide to the Android app architecture with a bunch of libraries called Architecture Components. This looks very promising since Android has been missing a standard way of implementing some kind of clean architecture. There were many unofficial ways to implement MVP and MVVM patterns, from which I had a chance to use a couple, including Mosby.
The problem was lack of standards. When I switched a project I had to learn completely new MVP/MVC/MVVM implementation which did exactly the same thing I was used to, just in a different way. I always thought it would be nice if Google provided some “official” support for app architecture which the industry could adopt.
In this post, I’m going to explore the ViewModel, LifecycleOwner, and LiveData from the Architecture Components Library. All the code here is of course Kotlin.
The code for this tutorial is available here. The sample app requires Android Studio 3.0, at the time of writing this post I used Android Studio 3.0 Canary 5. If you want to use Canary version of Android Studio along your stable version on the same machine, check out this video. I will update the GitHub repository to more stable versions of Android Studio 3.0 when available.
As an example, I created a simple app which contains Activity and two Fragments. The app is showing two Fragments connected to shared Activity. The first Fragment is displaying simple countdown timer, the second Fragment has all the controls:
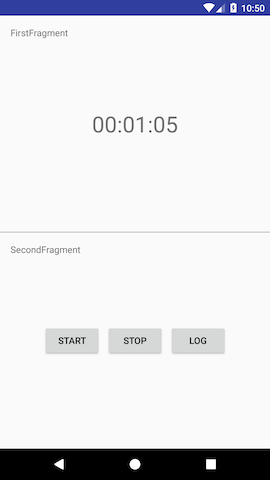
When you tap “START” the app starts the counter:
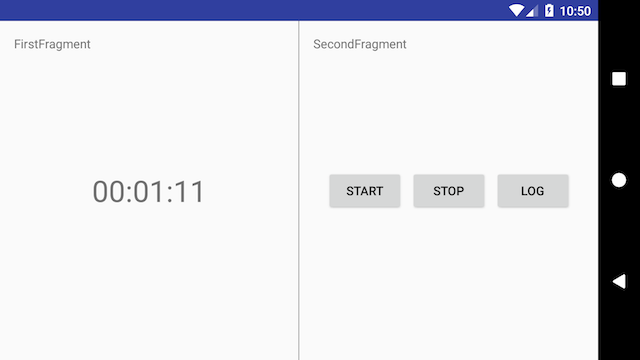
The state of the counter is preserved during orientation change, when the shared Activity is being recreated:
You can also stop the timer or log the timer state.
App’s architecture explained
First, we need to import the required library. To do this we add the dependency to the apps build.gradle file in dependencies section:
where '$arch_version' is the library’s version. Google is currently providing Architecture Components as a separate library but after reaching v1.0 it will be part of the support libraries.
Our shared Activity extends LifecycleActivity() from the library.
Our app’s business logic is located in SharedViewModel class, which extends ViewModel class. Its purpose is to “store and manage UI-related data so that the data survives configuration changes such as screen rotations”. The business logic here is a simple countdown timer. We store the formatted time String as MutableLiveData, an Architecture Components holder which stores data that can be observed. The difference between LiveData is that it exposes setters. Note that we also use a TimerStateModel object (custom Kotlin Data class) which also survives orientation change:
In FirstFragment we make the formattedTime observed. First we create timeObserver which updates our tvTimer TextView every time the mFormattedTime in our SharedViewModel is getting changed. We are obtaining instance of our SharedViewModel (see code line 10 below) and then we subscribe to the observer (code line 13). The activity cast as LifecycleOwner which we pass to the observe method is Kotlin’s convenience method to get our SharedActivity instance. We are accessing formattedTime via our public getter.
In the SecondFragment in onViewCreated method first we obtain an instance of our SharedViewModel and then we set all the appropriate onClickListeners (code lines 7-9).
In this simple example we delegated all of the business logic to a ViewModel. Our fragments are only responsible for observing the data changes (using convenience of LiveData) and responding for user input. Everything is managed by the Architecture Components library so there is very little boilerplate. Also, it reduces the possibility of shooting ourselves in the foot by mismanaging app state, which in my experience is one of the most common bugs every Android developer experiences.
If you want to do some further reading about Architecture Components I recommend those excellent articles:
On December 2016 Google released first Developer Preview of Android Things, their IoT platform, based on the Android operating system. I’m not going to elaborate here on details, you can find all you need on the official website but there are 3 interesting points to make about the fairly new OS:
It’s done by Google. There are dozens of IoT platforms now in the “Linux box” category, but somehow I have a feeling that Google is the most capable entity to provide standard OS for IoT applications.
In 2017 there are two categories of IoT devices. The small, mostly battery powered devices (think smart sensors, beacons etc), based on microcontrollers (right now ARM Cortex-M architecture seems to be dominating that field). Those devices have sub-1MB storage capacity and sub-100KB RAM capacity, running clock speeds below ~100MHz. The second category is “Linux box” devices, which are basically smartphone class right now (think something like mid-end smartphone circa 2013) with the capacity to run sophisticated software (i.e. Convolutional neural network, advanced networking etc.). Android Things is targeting the latter category.
It is basically and Android OS, running ART runtime environment, which means we can leverage all the Android tools, methodologies and libraries we love and use every day. And most importantly, we can write Kotlin for it!
How to get started with Android Things?
First, I recommend watching this presentation from Google I/O 2017 with the current overview of the platform:
Google I/O 2017 Android Things presentation
Second, you need to buy some hardware. But if you don’t have experience with electronics I don’t recommend starting straight from Android Things capable device. I recommend starting with inexpensive Arduino starter kit. There are two reasons why:
You will learn all the essentials (basics about electronics engineering, different parts, current, wiring a breadboard) on a cheap device that loads your code and boots in a matter of seconds. If you mess something up you won’t burn fairly expensive device like Raspberry Pi. And all the basics are the same on both platforms.
You will be able to use the same parts for Android Things development. Same breadboards, jumper wires, LEDs, resistors, LCDs etc.
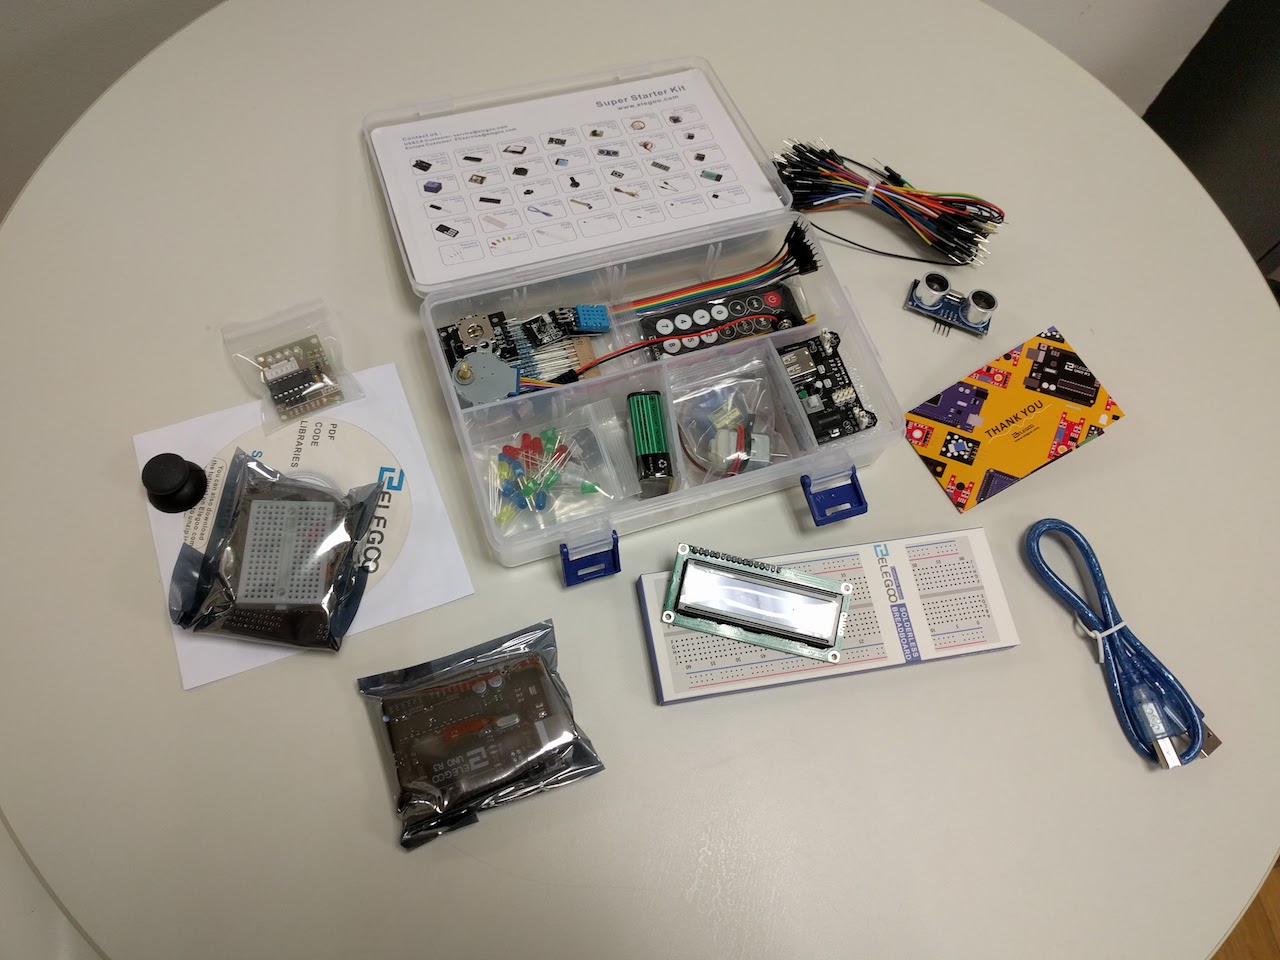
Arduino kit by Kuman
I recommend cheap Arduino UNO R3 clone starter kit. I bought a starter kit from Kuman for around ~30USD from Amazon, and the quality of the Arduino board was quite nice. In my opinion, the UNO R3 version is best for learning purposes (there are dozens more Arduino boards) cause this one is the “standard”, easy to learn (pins are clearly marked so it is super easy to wire it up) and most of the tutorials use this board. When choosing your Arduino kit, make sure it has some female to male jumper wires included since the Raspberry Pi 3 uses male GPIO ports. Arduino uses custom IDE and the language you program in is based on C and C++. The IDE is very mature and a pleasure to develop in. After getting your starter kit, I would recommend going through this tutorial series by Jeremy Blum. It goes through all the basics of electronics engineering, almost all the knowledge you acquire will be directly transferred to Android Things development.
Arduino wired up with the LCD screen
After playing a bit with Arduino and going through the basics you can switch to Android Things. For the first development board, I would recommend Raspberry Pi 3 Model B. It is very popular device, you can get it in any country for about 30-40USD. On a recent Android Developers Backstage podcast, Android Things guys mentioned that this device is by far the most popular now in the community, which makes troubleshooting a lot easier. All the flashing and development instructions are available on the official website. As always, Stack Overflow is very helpful, especially now, during the preview phase were the official docs aren’t mature yet.
Hello world of electronics: a blinking LED
Arduino 1602 LCD screen wired for Raspberry Pi with Android Things

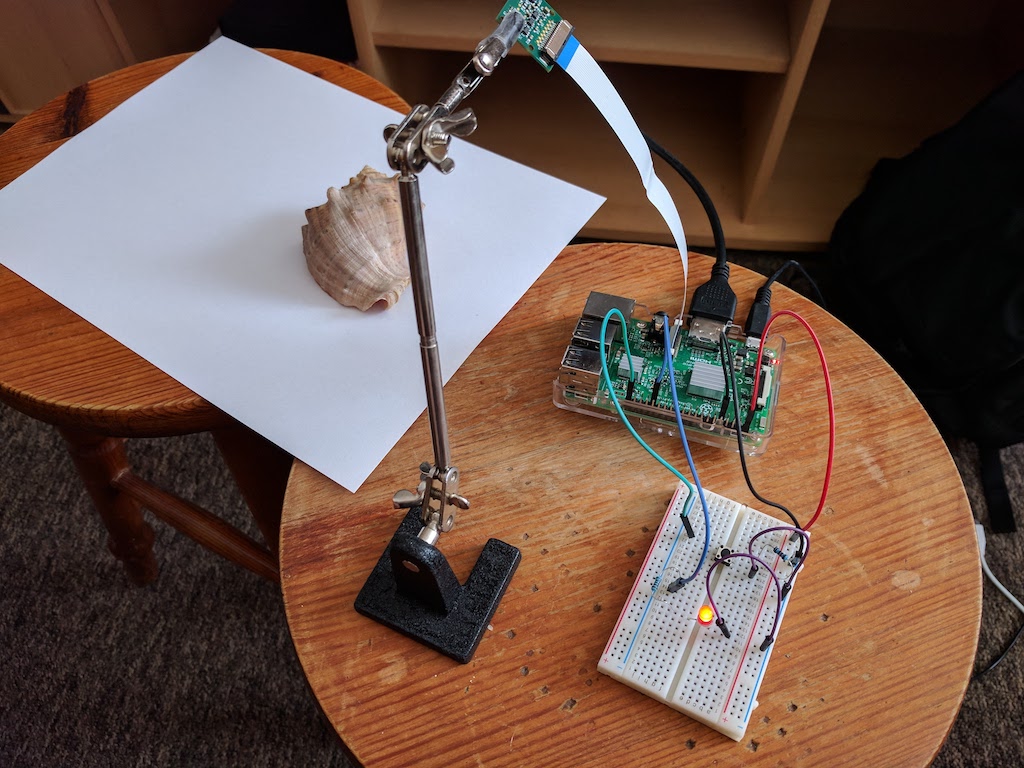 Quick and dirty setup
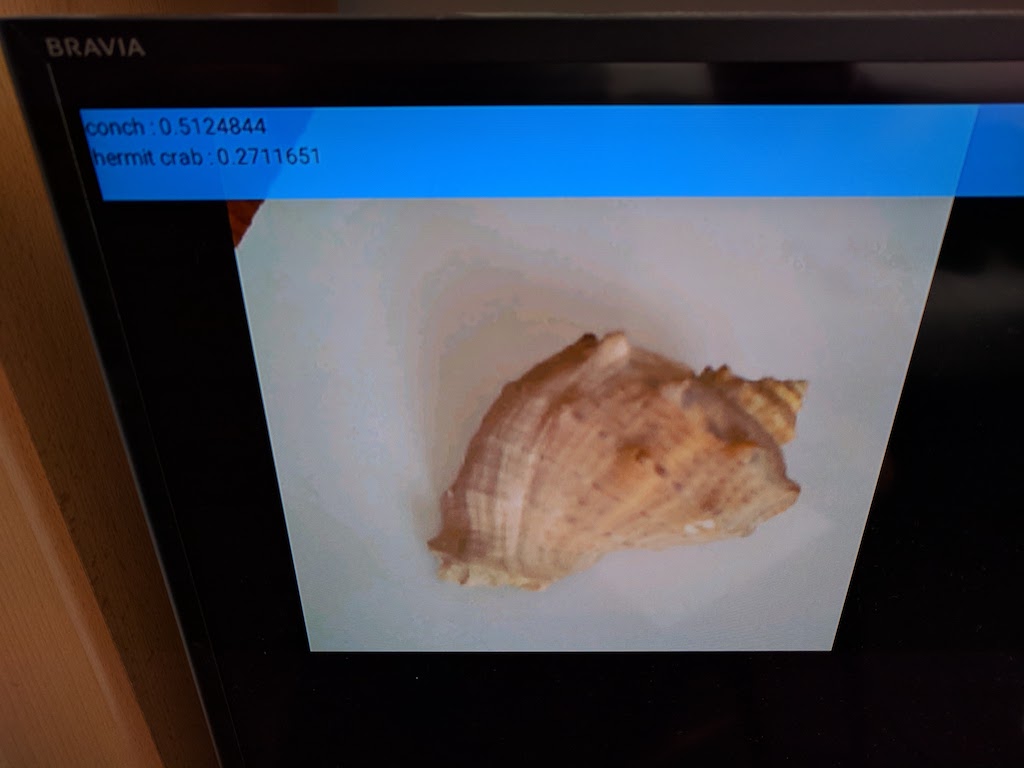 It recognizes the conch shell with 51% certainty
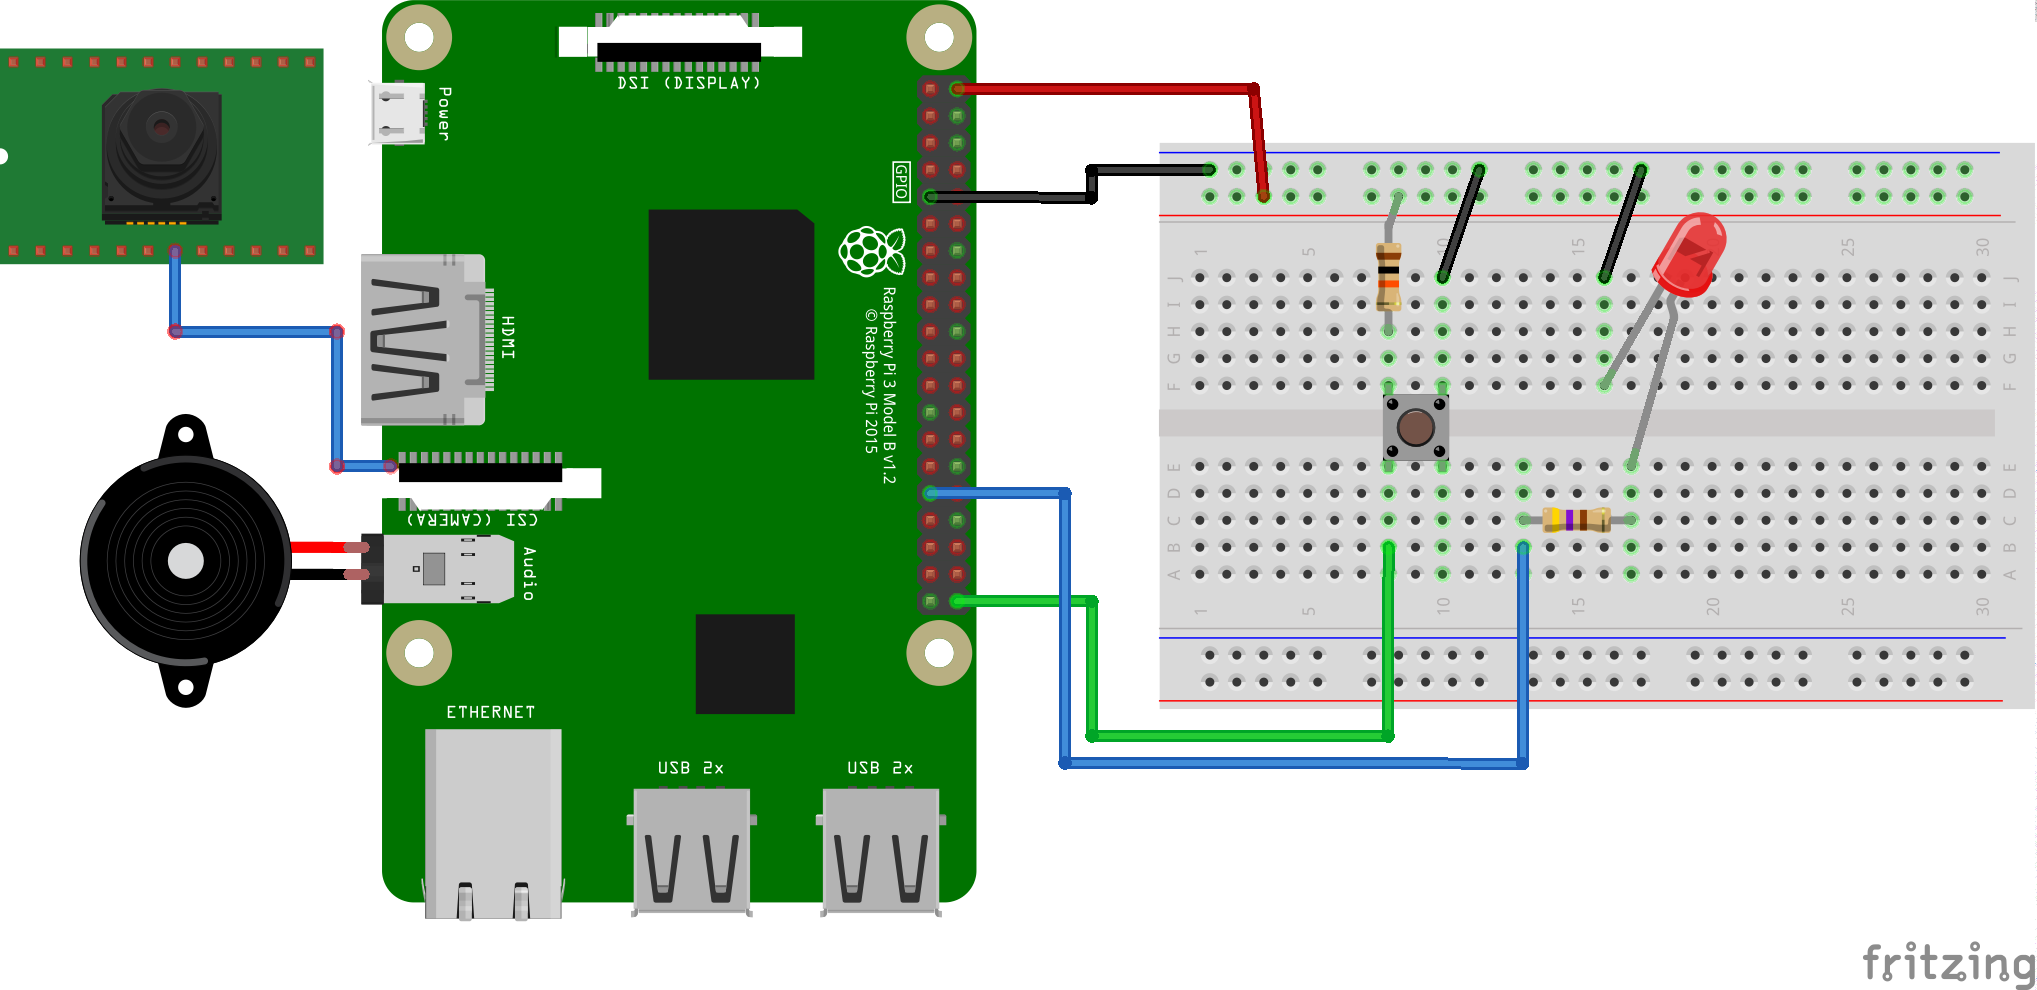
 Arduino kit by Kuman
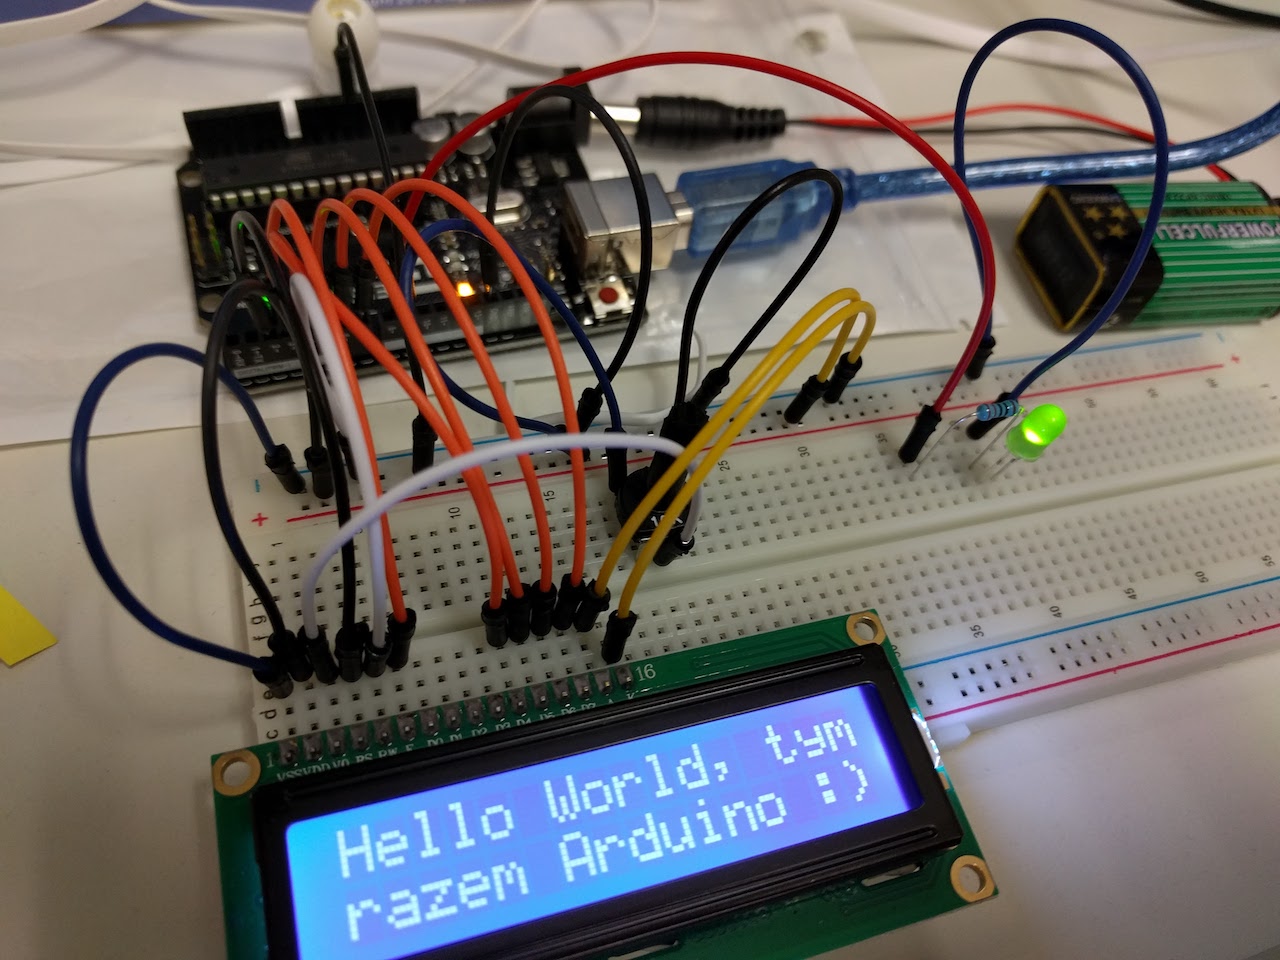 Arduino wired up with the LCD screen
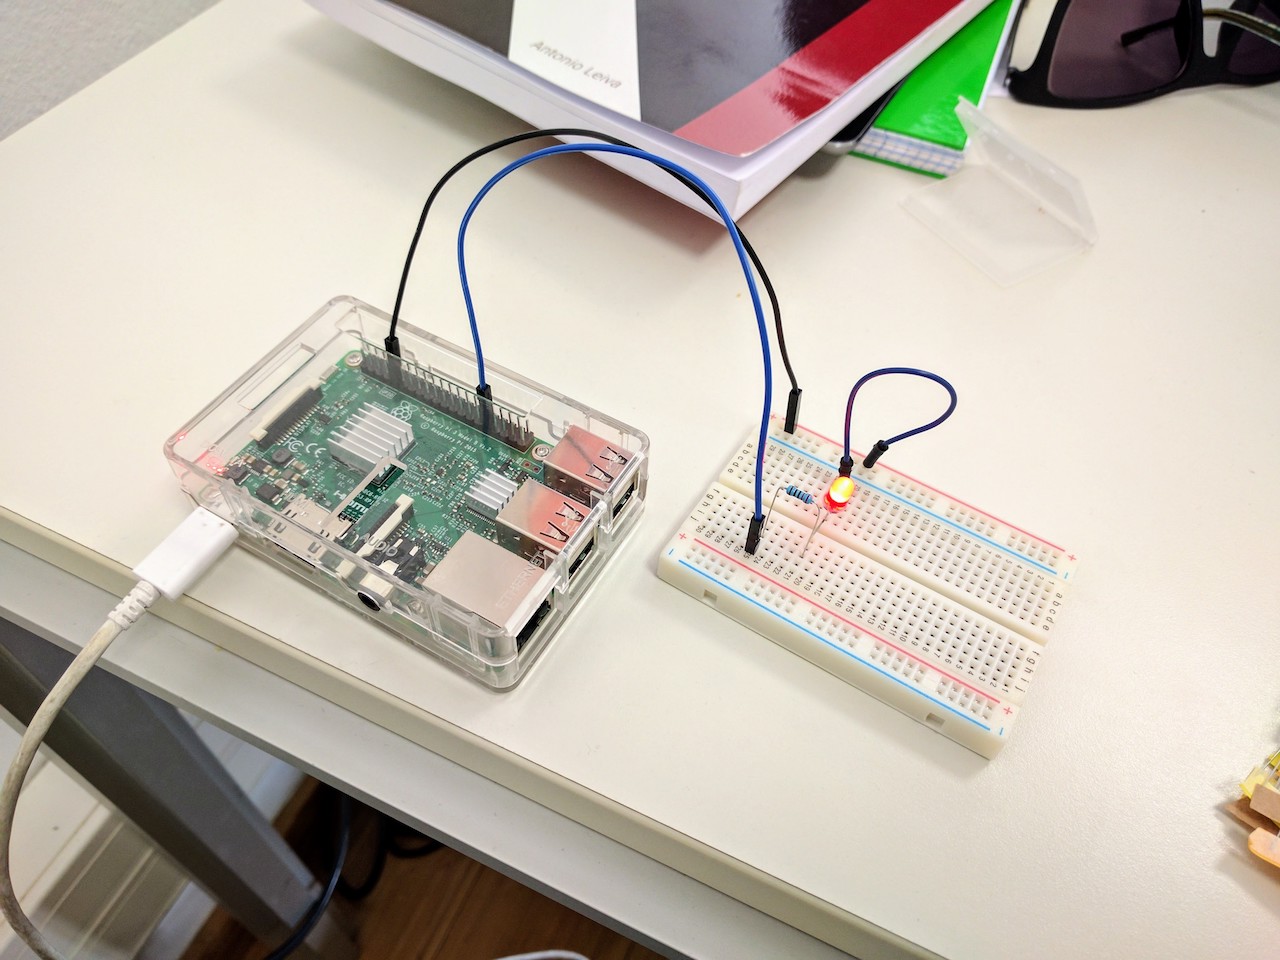 Hello world of electronics: a blinking LED
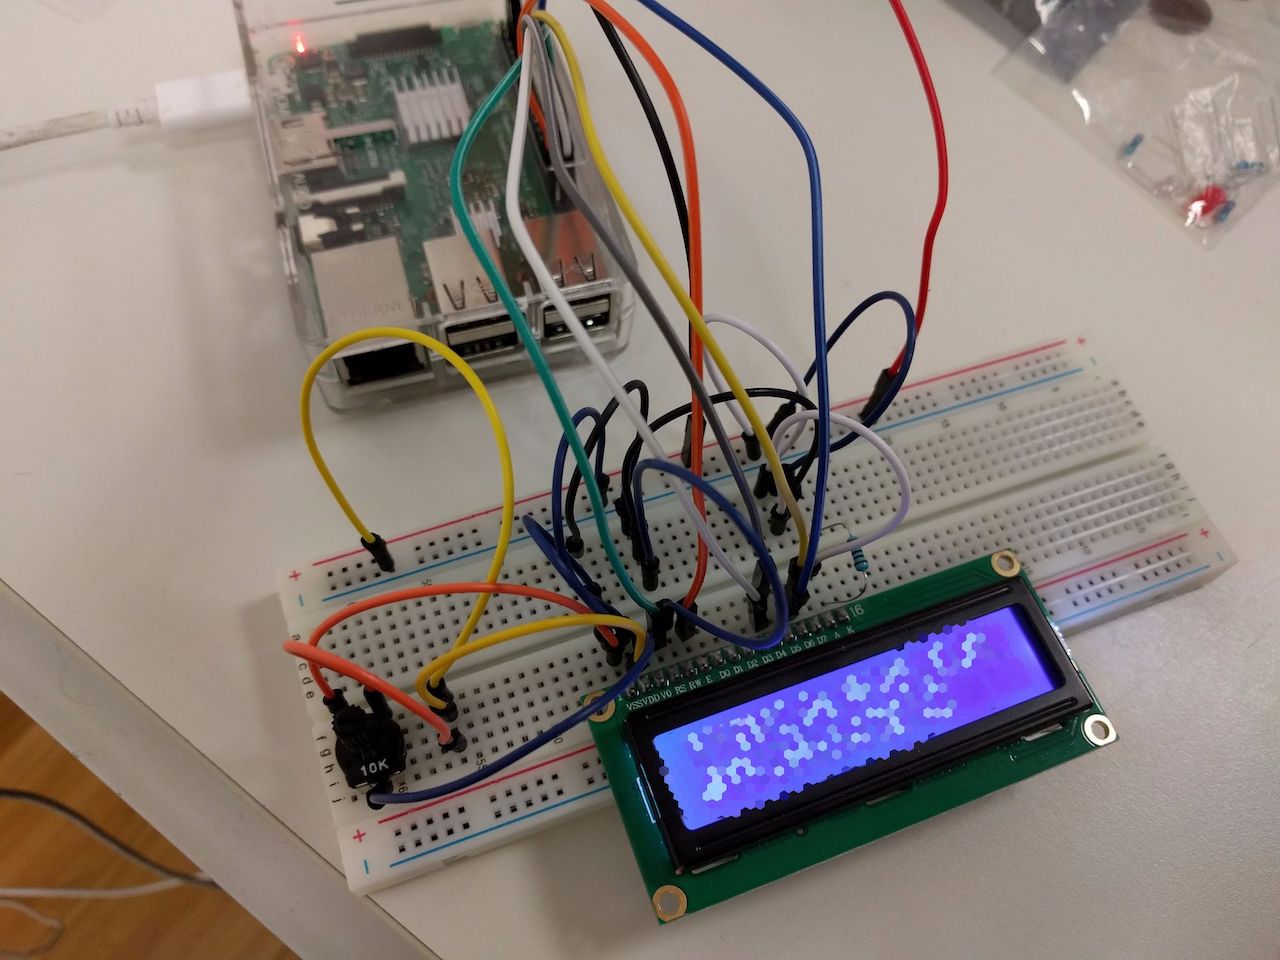 Arduino 1602 LCD screen wired for Raspberry Pi with Android Things